


Artificial Intelligence (AI) has changed how your business interacts with customers. At the forefront of this transformation are AI-powered chatbots. It provides a way to help you automate customer service, handle large-scale inquiries, and improve user experiences in various sectors.
With its simplicity and rich set of libraries, Python is one of the most powerful programming languages that enables you to build intelligent bots. Whether you’re a beginner or an experienced developer, this comprehensive guide details creating a functional AI chatbot using Python.
What Is an AI Chatbot?
An AI chatbot is an advanced software program that allows you to simulate human conversations through text or voice. By utilizing AI, the bot understands your questions and provides appropriate responses instantly. You can find AI-powered chatbots on e-commerce, customer service, banking, and healthcare websites, as well as on popular instant messaging apps. They help you by offering relevant information, answering common questions, and solving problems anytime, all without needing a human expert.
What makes AI chatbots effective is their ability to handle many conversations simultaneously. They learn from previous conversations, which enables them to improve their responses over time. Some chatbots can also customize their replies based on your preferences, making your experience even more efficient.
Why Do You Need AI Chatbots for Customer Service?
- Continuous Availability: Chatbots help you respond instantly to customer inquiries 24/7. This continuous availability ensures that end-users can receive assistance at any time, leading to quicker resolutions and higher customer satisfaction.
- Enhanced Scalability: Chatbots enable your business to manage various customer interactions simultaneously.
- Cost-Efficiency: By reducing the need for additional staff, chatbots help you save on hiring and training expenses over time.
- Gathering Valuable Data Insights: Chatbots allow you to collect essential information during customer interactions, such as preferences and common issues. Analyzing this data can help you recognize market trends and refine strategies.
How Does AI Chatbots Work?
AI chatbots combine natural language processing (NLP), machine learning (ML), and predefined rules provided by data professionals to understand and respond to your queries. Here are the steps to learn how AI chatbots operate:
Step 1: User Input Recognition
You can interact with the chatbot by typing a message or speaking through a voice interface. Once the chatbot recognizes your user input, it will prepare to process the input using NLP.
Step 2: Data Processing
In the processing step, chatbots use the following NLP techniques for better language understanding and further analysis:
- Tokenization: This enables the chatbot to break down the input into individual words or characters called tokens.
- Part-of-Speech Tagging: The chatbot can identify whether each word in a sentence is a noun, verb, or adjective.
- Named Entity Recognition (NER): Allows the chatbot to detect and classify important entities like names, organizations, or locations.
To learn more about NLP tasks, read What Is Natural Language Processing?
Step 3: Intent Classification
After processing the input, the chatbot determines the intent or context behind your query. The chatbot uses NLP and ML to analyze the entities in your input. For example, consider a prompt like, “Can you tell me the latest iPhone?.” The chatbot finds key phrases like “latest” and “iPhone” from this prompt through NER. Then, it analyzes the emotional tone of the query by performing sentiment analysis and produces a relevant response.
Step 4: Generating Responses
Once the chatbot understands the intent and context of your input, it generates a response. This can be a pre-written reply, an answer based on information found in databases, or a dynamically created response by searching online resources. Finally, the chatbot replies to you, continuing the conversation.
Step 5: Learning and Improvement
In this step, the chatbot uses ML to learn from previous interactions and user preferences to improve the responses over time. By understanding past conversations, chatbots can figure out what you need, clarify any confusion, and recognize emotions like happiness or sarcasm. This helps the chatbot to handle follow-up questions smoothly and provide tailored answers.
Types of AI Chatbots
Each type of AI chatbot meets different needs and shows how AI can improve user interaction. Let’s look at the two types of AI chatbots:
Rule-Based Chatbots
Rule-based chatbots are simple AI systems that are trained on a set of predefined rules to produce results. They do not learn from past conversations but can use basic AI techniques like pattern matching. These techniques help the chatbots to recognize your query and respond accordingly.
Self-Learning Chatbots
These chatbots are more advanced because they can understand your intent on their own. They use techniques from ML, deep learning, and NLP. Self-learning chatbots are sub-divided into two:
- Retrieval-Based Chatbots: These work similarly to rule-based chatbots using predefined input patterns and responses. However, rule-based chatbots depend on simple pattern-matching to respond. On the other hand, retrieval-based chatbots use advanced ML techniques or similarity measures to get the best-matching response from a database of possible responses. These chatbots also have self-learning capabilities to enhance their response selection over time.
- Generative Chatbots: Generative chatbots produce responses based on your input using a seq2seq (sequence-to-sequence) neural network. The seq2seq network is a model built for tasks that contain input and output sequences of different lengths. It is particularly useful for NLP tasks like machine translation, text summarization, and conversational agents.
Build Your First AI Chatbot Using Python
You have gained a solid understanding of different types of AI chatbots. Let’s put theory into practice and get hands-on experience in developing each bot using Python!
Common Prerequisites:
- Install the Python version 3.8 or above on your PC.
Tutorial on Creating a Simple Rule-Based Chatbot Using Python From Scratch
In this tutorial, you will learn how to create a GUI for a rule-based chatbot using the Python Tkinter module. This interface includes a text box for providing your input and a button to submit that input. Upon clicking the button, a function will process your intent and respond accordingly based on the defined rules.
Prerequisites:
The Tkinter module is included by default in Python 3. x versions. If you do not have the Tkinter module installed, you can do it by using the following pip command:
pip install tkSteps:
- Open Notepad from your PC or use any Python IDE like IDLE, PyCharm, or Spyder.
- Write the following script in your code editor:
from tkinter import *

root = Tk()

root.title("AI Chatbot")

def send_query():

    send_query = "You -> "+e.get()

    txt.insert(END, "\n"+send_query)

    user_name = e.get().lower()

    if(user_name == "hello"):

        txt.insert(END, "\n" + "Bot -> Hi")

    elif(user_name == "hi" or user_name == "hai" or user_name == "hiiii"):

        txt.insert(END, "\n" + "Bot -> Hello")

    elif(e.get() == "How are you doing?"):

        txt.insert(END, "\n" + "Bot -> I’m fine and what about you")

    elif(user_name == "fine" or user_name == "I am great" or user_name == "I am doing good"):

        txt.insert(END, "\n" + "Bot -> Amazing! how can I help you.")

    else:

        txt.insert(END, "\n" + "Bot -> Sorry! I did not get you")

    e.delete(0, END)

txt = Text(root)

txt.grid(row=0, column=0, columnspan=2)

e = Entry(root, width=100)

e.grid(row=1, column=0)

send_query = Button(root, text="Send", command=send_query).grid(row=1, column=1)

root.mainloop()- Save the file as demo.py in your desired directory.
- Open the command prompt and go to the folder where you save the Python file using cd.
- Type Python demo.py in the Python interpreter and press Enter.
- Once you execute the file, you can communicate with the chatbot by running the application from the Tkinter interface.
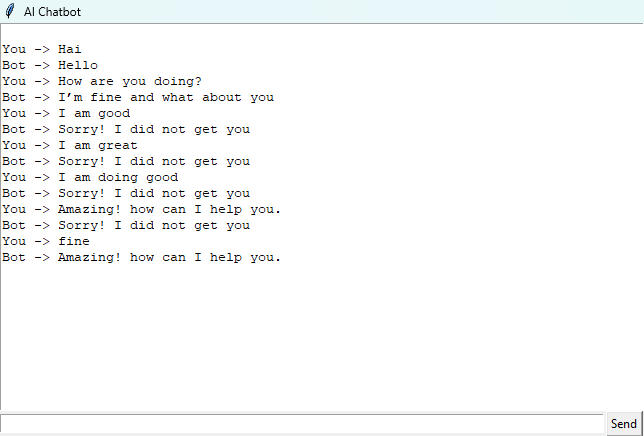
Sample Output:
Tutorial on Creating a Rule-Based Chatbot Using Python NLTK Library
NLTK (Natural Language Toolkit) is a powerful library in Python that helps you work with NLP tasks while building a chatbot. It provides tools for text preprocessing, such as tokenization, stemming, tagging, parsing, and semantic analysis. In this tutorial, you will explore advanced rule-based AI chatbots using the NLTK library:
Prerequisites:
Install the NLTK library using the pip command:
pip install nltkSteps:
- Create a new Notepad file as demo2.py and write the following code:
import nltk

from nltk.chat.util import Chat, reflections

dialogues = [

    [

        r"my name is (.*)",

        ["Hello %1, How are you?",]

    ],

    [

        r"hi|hey|hello",

        ["Hello", "Hey",]

    ],

    [

        r"what is your name ?",

        ["I am a bot created by Analytics Drift. You can call me Soozy!",]

    ],

    [

        r"how are you ?",

        ["I'm doing good, How about you?",]

    ],

    [

        r"sorry (.*)",

        ["It's alright","Its ok, never mind",]

    ],

    [

        r"I am great",

        ["Glad to hear that, How can I assist you?",]

    ],

    [

        r"i'm (.*) doing good",

        ["Great to hear that","How can I help you?:)",]

    ],

    [

        r"(.*) age?",

        ["I'm a chatbot, bro. \nI do not have age.",]

    ],

    [

        r"what (.*) want ?",

        ["Provide me an offer I cannot refuse",]

    ],

    [

        r"(.*) created?",

        ["XYZ created me using Python's NLTK library ","It’s a top secret ;)",]

    ],

    [

        r"(.*) (location|city) ?",

        ['Odisha, Bhubaneswar',]

    ],

    [

        r"how is the weather in (.*)?",

        ["Weather in %1 is awesome as always","It’s too hot in %1","It’s too cold in %1","I do not know much about %1"]

    ],

    [

        r"i work in (.*)?",

        ["%1 is a great company; I have heard that they are in huge loss these days.",]

    ],

    [

        r"(.*)raining in (.*)",

        ["There is no rain since last week in %2","Oh, it's raining too much in %2"]

    ],

    [

        r"how (.*) health(.*)",

        ["I'm a chatbot, so I'm always healthy ",]

    ],

    [

        r"(.*) (sports|game) ?",

        ["I'm a huge fan of cricket",]

    ],

    [

        r"who (.*) sportsperson ?",

        ["Dhoni","Jadeja","AB de Villiars"]

    ],

    [

        r"who (.*) (moviestar|actor)?",

        ["Tom Cruise"]

    ],

    [

        r"I am looking for online tutorials and courses to learn data science. Can you suggest some?",

        ["Analytics Drift has several articles offering clear, step-by-step guides with code examples for quick, practical learning in data science and AI."]

    ],

    [

        r"quit",

        ["Goodbye, see you soon.","It was nice talking to you. Bye."]

    ],

]

def chatbot():

    print("Hi! I am a chatbot built by Analytics Drift for your service")

    chatbot = Chat(dialogues, reflections)

    chatbot.converse()

if __name__ == "__main__":

chatbot()- Open your command prompt and go to the folder in which you save the file.
- Run the code using the following command:
Python demo2.py- You can now chat with your AI chatbot.
Sample Output:

In the above program, the nltk.chat module utilizes various regex patterns, which enables the chatbot to identify user intents and generate appropriate answers. To get started, you must import the Chat class and reflections, a dictionary that maps the basic inputs to corresponding outputs. For example, if the input is “I am,” then the output is “You are.” However, this dictionary has limited reflections; you can create your own dictionary with more replies.
Tutorial on Creating Self-Learning Chatbots Using Python Libraries and Anaconda
This tutorial offers a step-by-step guide to help you understand how to create a self-learning Python AI chatbot. You must utilize Anaconda and various Python libraries, such as NLTK, Keras, tensorflow, sklearn, numpy, and JSON, to build your bot.
Prerequisites:
- Install Anaconda on your PC
- Create a virtual environment tf-env in your Anaconda prompt.
conda create –name tf-env- Activate the environment:
conda activate tf-env- Install the following modules
conda install -c conda-forge tensorflow keras

conda install scikit-learn

conda install nltk

conda install ipykernal- Create a Python kernel associated with your virtual environment
python -m ipykernel install --user --name tf-env --display-name "Python (tf-env)"- Open Jupyter Notebook by typing in the prompt as:
jupyter labSteps:
- Initially, you must Import the necessary libraries for lemmatization, preprocessing, and model development using the following script:
import json

import numpy as np

import random

import nltk

from nltk.stem import WordNetLemmatizer

from sklearn.preprocessing import LabelEncoder

from tensorflow.keras.models import Sequential

from tensorflow.keras.layers import Dense, Activation, Dropout

from tensorflow.keras.optimizers import SGD- Load the following data file (“intents.json) into your Python script. This file includes tags, patterns, and responses for your chatbots to interpret your input and respond.
Sample JSON file:
{

    "intents": [

        {

            "tag": "greeting",

            "patterns": [

                "Hi",

                "Hello",

                "How are you?",

                "Is anyone there?",

                "Good day"

            ],

            "responses": [

                "Hello! How can I help you today?",

                "Hi there! What can I do for you?",

                "Greetings! How can I assist you?"

            ]

        },

        {

            "tag": "goodbye",

            "patterns": [

                "Bye",

                "See you later",

                "Goodbye",

                "I am leaving",

                "Take care"

            ],

            "responses": [

                "Goodbye! Have a great day!",

                "See you later! Take care!",

                "Bye! Come back soon!"

            ]

        },

        {

            "tag": "thanks",

            "patterns": [

                "Thanks",

                "Thank you",

                "That's helpful",

                "Thanks for your help",

                "Appreciate it"

            ],

            "responses": [

                "You're welcome!",

                "Glad to help!",

                "Anytime! Let me know if you need anything else."

            ]

        },

        {

            "tag": "noanswer",

            "patterns": [],

            "responses": [

                "Sorry, I didn't understand that.",

                "Can you please rephrase?",

                "I’m not sure I understand. Could you clarify?"

            ]

        },

        {

            "tag": "options",

            "patterns": [

                "What can you do?",

                "Help me",

                "What are your capabilities?",

                "Tell me about yourself"

            ],

            "responses": [

                "I can assist you with various inquiries! Just ask me anything.",

                "I'm here to help you with information and answer your questions."

            ]

        }

    ]

}
Once you create the above JSON file in the Jupyter Notebook, you can run the following Python Script to load them:
with open('intents.json') as file:

data = json.load(file)- The next step involves preprocessing the JSON data by tokenizing and lemmatizing text patterns from intents.
lemmatizer = WordNetLemmatizer()

corpus = []

labels = []

responses = []

for intent in data['intents']:

    for pattern in intent['patterns']:

        word_list = nltk.word_tokenize(pattern)

        word_list = [lemmatizer.lemmatize(w.lower()) for w in word_list]

        corpus.append(word_list)

        labels.append(intent['tag'])

label_encoder = LabelEncoder()

labels_encoded = label_encoder.fit_transform(labels)

all_words = sorted(set(word for words in corpus for word in words))
This processing helps you to generate a corpus of processed word lists, encoding labels, and a sorted list of unique words. These outputs will be used to train your chatbot model.
- Following the previous step, you can create a training dataset for your chatbot. The training data should then be converted into numerical format.
x_train = []

y_train = []

for words in corpus:

    bag = [0] * len(all_words)

    for w in words:

        if w in all_words:

            bag[all_words.index(w)] = 1

    x_train.append(bag)

x_train = np.array(X_train)

y_train = np.array(labels_encoded)
The x_train list holds the feature vectors or bag of words for each input, while y_train stores the encoded labels corresponding to your input.
- The next step involves building and training a chatbot using the Keras sequential model. The sequential model allows you to build a neural network layer by layer, with each layer having exactly one input tensor and one output tensor.
Here, you need to initialize the sequential model and add the required number of layers, as shown in the following code:
model = Sequential()

model.add(Dense(128, input_shape=(len(X_train[0]),), activation='relu'))

model.add(Dropout(0.5))

model.add(Dense(64, activation='relu'))

model.add(Dropout(0.5))

model.add(Dense(len(set(labels)), activation='softmax'))
Once the neural network model is ready, you can train and save it for future use.
model.compile(loss='sparse_categorical_crossentropy', optimizer=SGD(learning_rate=0.01), metrics=['accuracy'])

model.fit(X_train, y_train, epochs=200, batch_size=5, verbose=1)

model.save('chatbot_model.h5')- To predict responses according to your input, you must implement a function as follows:
def chatbot_reply(text):
    input_words = nltk.word_tokenize(text)
    input_words = [lemmatizer.lemmatize(w.lower()) for w in input_words]

    bag = [0] * len(all_words)
    for w in input_words:
        if w in all_words:
            bag[all_words.index(w)] = 1

    prediction = model.predict(np.array([bag]))[0]
    tag_index = np.argmax(prediction)
    tag = label_encoder.inverse_transform([tag_index])[0]

    for intent in data['intents']:
        if intent['tag'] == tag:
            return random.choice(intent['responses'])

return "Sorry, I did not understand that.”- Collecting the inputs and associated responses, you can make a self-learned chatbot from past interactions and feedback.
user_inputs = []

user_labels = []

def record_interaction(user_input, chatbot_reply):

    user_inputs.append(user_input)

    user_labels.append(chatbot_reply)
Finally, you can call this function after every interaction to collect data for future conversations with a chatbot.
record_interaction("User's message", "Chatbot's response")- You can begin interaction with your chatbot using the following Python code:
from tensorflow.keras.models import load_model

model = load_model('chatbot_model.h5')

def chat():

    print("Chatbot: Hello! I am your virtual assistant. Type 'quit' to exit.")

    while True:

        user_input = input("You: ")

        if user_input.lower() == 'quit':

            print("Chatbot: Goodbye! Have a great day!")

            break

        response = chatbot_response(user_input)

        print(f"Chatbot: {response}")
chat()
To try the above Python code, click here.
Sample Output:

Tutorial on Developing a Self-Learning Chatbot Using Chatterbot Library
The Python Chatterbot library is an open-source machine learning library that allows you to create conversational AI chatbots. It uses NLP to enable bots to engage in dialogue, learn from previous messages, and improve over time. In this tutorial, you will explore how to build a self-learning chatbot using this library:
Prerequisites:
- Ensure you have installed Python version 3.8 or below on your PC.
- Install chatterbot libraries using pip:
pip install chatterbot

pip install chatterbot-corpus
Steps:
- Import required libraries to develop and train your chatbot.
from chatterbot import ChatBot

from chatterbot.trainers import ChatterBotCorpusTrainer, ListTrainer- Create your chatbot instance with a unique name and storage adapter. The storage adapter is a component that allows you to manage how the chatbot’s data is stored and accessed.
chatbot = ChatBot(

    'SelfLearningBot',

    storage_adapter='chatterbot.storage.SQLStorageAdapter',

    database_uri='sqlite:///database.sqlite3',

)- Train your chatbot with a prebuilt English language corpus ChatterBotCorupusTrainer:
trainer = ChatterBotCorpusTrainer(chatbot)

trainer.train('chatterbot.corpus.english')- Alternatively, you can utilize ListTrainer for custom model training.
custom_conversations = [

    "Hello",

    "Hi there!",

    "How are you?",

    "I'm doing great, thanks!",

    "What's your name?",

    "I am a self-learning chatbot.",

    "What can you do?",

    "I can chat with you and learn from our conversations.",

]
Once the custom conversation list is created, you can train the chatbot with it.
list_trainer = ListTrainer(chatbot)

list_trainer.train(custom_conversations)- Define a function to communicate with your chatbot:
def chat():

    print("Chat with the bot! (Type 'exit' to end the conversation)")

    while True:

        user_input = input("You: ")

        if user_input.lower() == 'exit':

            print("Goodbye!")

            break

        bot_response = chatbot.get_response(user_input)

        print(f"Bot: {bot_response}")

chatbot.learn_response(user_input, bot_response)- You can begin chatting with your AI bot now.
if __name__ == "__main__":

    chat()
You can also embed your chatbot into a web application created using Django or Flask.
Best Practices for Creating AI Chatbots Using Python
- Use NLP techniques such as NER and intent classification, along with ML models trained on large datasets, to enhance understanding of varied inputs.
- Handle complex contexts using dialogue management and session tracking tools available in a flexible conversation AI software, Rasa.
- Train the chatbot to manage unfamiliar or out-of-scope queries by directing your customers to human experts or suggesting alternate questions.
- Implement personalization by using your client’s name and tailoring responses based on preferences and past interactions.
- Plan for scalability and performance monitoring of AI chatbots over time with cloud services and robust deployment practices.
Use Cases of AI Chatbot
- E-commerce: AI chatbots assist you in finding products, making purchases, and providing personalized recommendations based on your browsing history.
- Travel Booking: AI chatbots assist travelers in planning trips, booking flights and hotels, and providing travel recommendations.
- Healthcare: Chatbots can help your patients by providing information about symptoms, scheduling appointments, and reminding them about medication or follow-ups.
- Personal Finance: You can manage your finances by seeking budget advice, tracking expenses, and gaining insights into spending habits.
Final Thoughts
Building an AI chatbot using Python is an effective way to modernize your business and enhance the user experience. By leveraging the powerful Python libraries, you can create a responsive and intelligent chatbot. These chatbots will be capable of handling a large number of inputs, providing continuous support, and engaging you in meaningful conversations.
While rule-based chatbots serve their primary purpose, self-learning chatbots offer even more significant benefits by adapting and improving based on past conversations and feedback. This capability enables them to understand the user intents, tailor responses better, and create more personalized customer service.
FAQs
Which libraries are commonly used to build chatbots in Python?
Popular libraries include Chatterbot, NLTK, spaCy, Rasa, and TensorFlow.
Do I need to know machine learning to build a chatbot?
Basic chatbots can be created using rule-based systems and do not need to know machine learning. However, understanding machine learning can enhance your chatbot’s capabilities.